How to Make Homemade Apple Cider Vinegar in 4 Weeks.
Tired of buying expensive apple cider vinegar when you could make it practically free from apple scraps? This homemade version takes just 5 minutes of prep time and transforms leftover peels and cores into rich, living vinegar in about 4 weeks—no fancy equipment needed! You’ll save money while creating a more flavorful product than most store-bought brands, and the hands-off fermentation process does all the work for you. Ready to turn your kitchen scraps into liquid gold? Here’s exactly how to make it.
What You’ll Need: Essential Ingredients and Equipment

To ferment apple scraps into vinegar, you’ll need just three core ingredients: apple remnants (cores, peels, or whole apples), filtered water, and sugar to fuel the fermentation process. The sugar concentration should reach 2-3% to support acetobacter growth during acetic acid conversion.
For equipment, you’ll require a wide-mouth glass jar (quart-sized minimum) to maximize oxygen exposure during fermentation. Chlorine-free water prevents inhibition of beneficial bacteria essential for producing homemade apple cider vinegar. You’ll also need breathable cloth (cheesecloth or coffee filter) secured with a rubber band, allowing airflow while blocking contaminants.
A wooden spoon for stirring and pH strips help monitor acidity levels. Avoid metal containers, as acids corrode reactive metals. Maintain room temperature between 68-75°F for ideal bacterial activity throughout the four-week fermentation period. For best results, select organic apples that are free from mold or bruising, as damaged fruit can introduce unwanted bacteria into your fermentation.
The Traditional Apple Scrap Method: Step-by-Step Process
You’ll transform apple scraps into vinegar through a controlled fermentation process that requires precise timing and environmental conditions. The method begins with submerging your prepared scraps in a sugar-water solution, where naturally occurring yeast converts sugars to alcohol before acetobacter bacteria oxidize it into acetic acid.
Success depends on monitoring specific visual and olfactory indicators throughout each fermentation stage, followed by proper straining and storage techniques to preserve your finished vinegar. Maintain an optimal temperature of 65-75°F (18-24°C) throughout the process to ensure beneficial bacteria growth and proper fermentation.
Preparing Your Apple Scraps
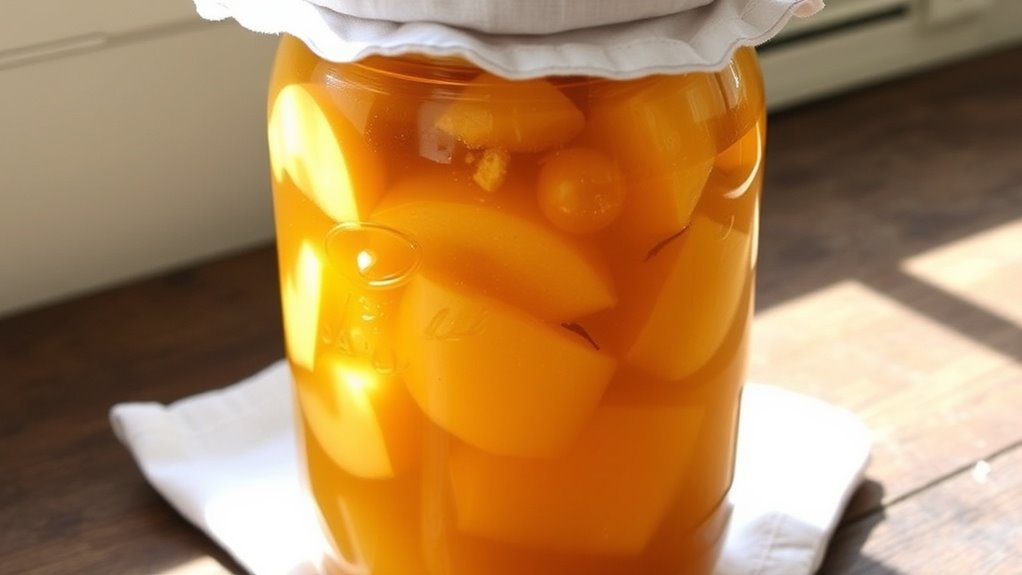
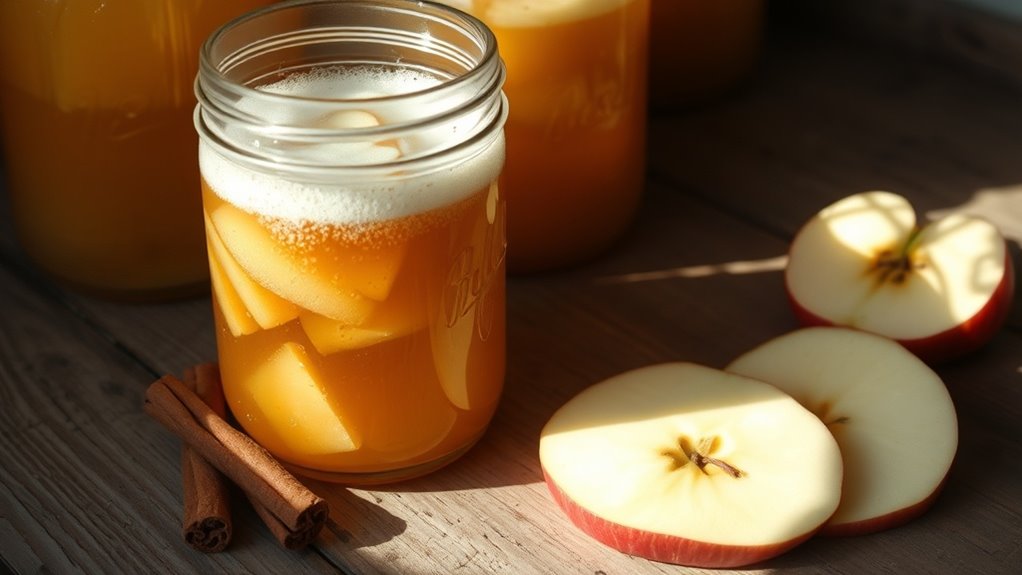
The foundation of quality apple cider vinegar begins with proper scrap preparation, which directly influences fermentation success and final acidity levels. You’ll need cores, peels, and any bruised portions from 6-8 organic apples—approximately 2 cups of scraps.
Rinse scraps under cold water to remove debris while preserving beneficial wild yeasts on the skin’s surface. Cut larger pieces into 1-2 inch segments to maximize surface area exposure for bacterial colonization. Remove any moldy sections completely, as these introduce competing microorganisms that’ll compromise fermentation.
Check that your scraps contain minimal seeds; excess tannins from crushed seeds can create bitter off-flavors. Pat scraps dry with clean towels before transferring to your fermentation vessel. This moisture control prevents dilution of your sugar solution.
Fermentation Timeline and Signs
Understanding fermentation progression requires monitoring specific visual and olfactory indicators across four distinct phases. Week one initiates aerobic fermentation—you’ll observe bubbles forming and a sweet, yeasty aroma developing.
During week two, alcohol conversion accelerates; the mixture becomes cloudy with a stronger fermented scent.
Week three marks acetobacter colonization—a thin pellicle forms on the surface, and you’ll detect sharp vinegar notes replacing alcohol odors.
By week four, acetic acid concentration peaks; the pellicle thickens, and the distinctive tangy vinegar smell intensifies.
Throughout fermentation, maintain temperatures between 60-80°F. Check your mixture every 2-3 days, ensuring scraps remain submerged beneath the liquid line.
If you notice fuzzy mold growth rather than smooth pellicle formation, discard immediately and restart the process.
Straining and Bottling Process
After four weeks of fermentation, proper straining technique determines your vinegar’s clarity and shelf stability. Line a fine-mesh strainer with cheesecloth or coffee filters, positioning it over a clean bowl. Pour the fermented liquid slowly, allowing gravity to separate sediment from the finished vinegar. Don’t press or squeeze the solids—this releases cloudy particles and compromises clarity.
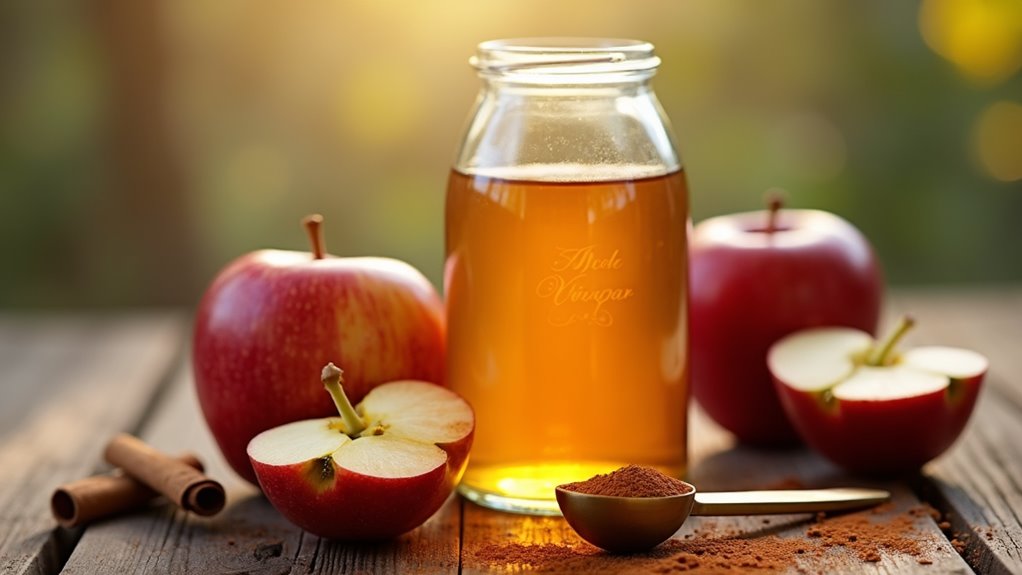
Transfer strained vinegar into sterilized glass bottles using a funnel. Leave one inch of headspace to accommodate any remaining microbial activity. Cork or cap loosely for the first week, then seal tightly once activity subsides.
Store bottles in a cool, dark location where temperatures remain between 60-70°F. Properly strained and bottled vinegar maintains potency for two years, developing complexity as it ages.
Alternative Methods: Whole Apples, Juice, and Mother Culture Techniques
While the traditional scrap method yields excellent results, you can accelerate fermentation by using whole apples, which provide more concentrated sugars for bacterial conversion.
Starting with pre-made apple juice eliminates the initial alcoholic fermentation stage, reducing production time to approximately two weeks. You’ll achieve the fastest results by introducing mother culture—a colony of live Acetobacter bacteria—which can produce finished vinegar in as little as seven to ten days. Regardless of your chosen method, maintain room-temperature conditions between 65-75°F to ensure proper fermentation and optimal bacterial activity.
Using Whole Apple Scraps
The most accessible method for home fermentation begins with apple scraps—cores, peels, and bruised sections you’d otherwise discard. You’ll need approximately 2 cups of scraps per quart jar.
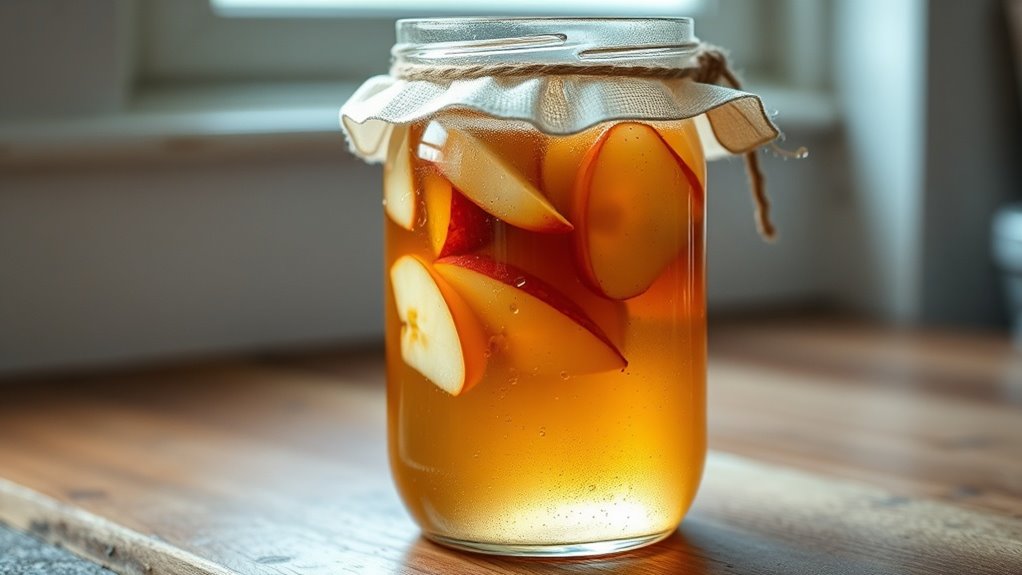
Submerge the pieces in dechlorinated water with 1 tablespoon of sugar dissolved per cup of liquid. The sugar feeds acetobacter bacteria, accelerating fermentation. Weight the scraps below the waterline using a fermentation weight or clean glass to prevent mold formation. Cover with breathable cloth secured by a rubber band. Place in a dark location at 60-80°F.
Bubbles will appear within 48 hours, indicating active fermentation. After 2 weeks, strain out solids and continue fermenting the liquid for another 2-4 weeks until desired acidity develops.
Starting With Apple Juice
Purchasing organic, unfiltered apple juice provides a faster alternative that bypasses the initial scrap fermentation phase. You’ll need unpasteurized juice containing natural yeasts, or you can add ¼ teaspoon wine yeast per gallon. Pour juice into a wide-mouth container, filling it three-quarters full to allow oxygen circulation. Cover with breathable cloth secured by rubber band.
The juice undergoes alcoholic fermentation first, converting sugars to alcohol within 1-2 weeks. You’ll notice bubbling activity and a cidery aroma. Once alcohol formation completes, acetic acid bacteria colonize the surface, oxidizing alcohol into acetic acid. This acetification requires 2-3 weeks at 60-80°F.
Monitor pH levels—finished vinegar reaches 2.5-3.5. Taste weekly after day fourteen until desired acidity develops.
Adding Mother Culture Starter
Add 20% mother culture to your apple juice base. This ratio establishes ideal bacterial concentration for efficient conversion.
| Method | Fermentation Time | pH Control |
|---|---|---|
| Mother Culture | 2-3 weeks | Precise |
| Spontaneous | 4-6 weeks | Variable |
The mother’s established bacterial colony immediately begins converting ethanol to acetic acid, bypassing the wild fermentation phase. You’ll achieve 4-6% acidity consistently. Maintain temperatures between 60-80°F for optimal Acetobacter activity. Monitor pH weekly using test strips; target 2.5-3.5 for proper acidification.
Week-by-Week Timeline: What to Expect During Fermentation
Once you’ve prepared your apple scrap mixture and secured it in a fermentation vessel, you’ll observe distinct biological phases over the next four weeks.
Week 1: Aerobic fermentation begins as wild yeasts convert sugars into ethanol. You’ll notice bubbling and a sweet, yeasty aroma.
Week 2: Alcohol concentration peaks around 5-8%. The liquid darkens, and bubbling intensity decreases as yeast activity slows.
Week 3: Acetobacter bacteria colonize the surface, forming a gelatinous pellicle. Acetic acid production accelerates, creating a sharp vinegar scent. The pH drops from 4.0 to 3.5.
Week 4: Acidification completes as acetic acid reaches 4-6% concentration. The pellicle thickens, and the liquid becomes clarified. Taste-test at day 28 to confirm proper acidity development before straining. Throughout the fermentation process, maintain a consistent temperature between 60-80°F to ensure optimal bacterial activity and prevent stalling.
Testing for Readiness: Ph Levels, Taste, and Visual Indicators
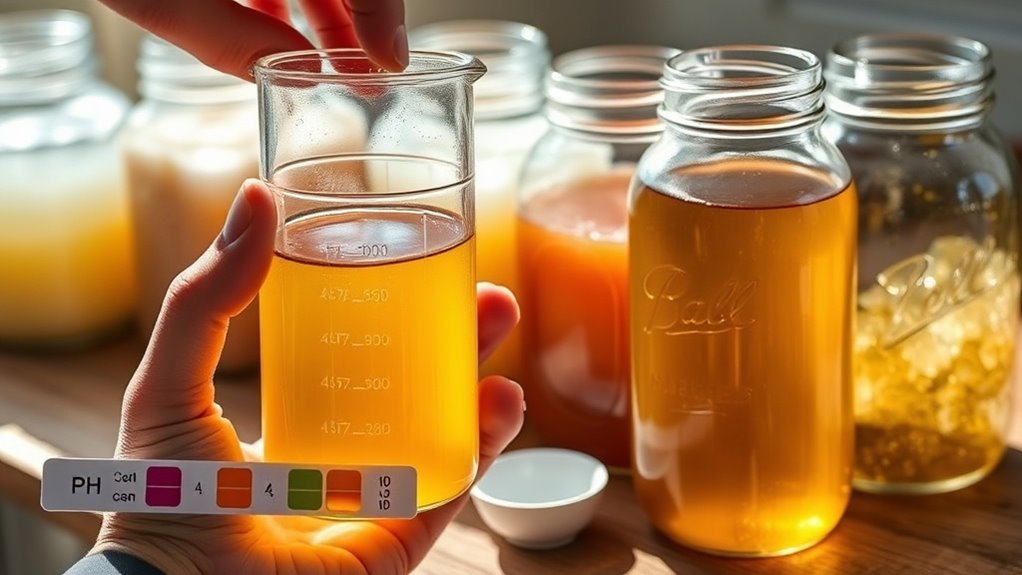
Your vinegar has reached day 28, but chronological completion doesn’t guarantee chemical readiness. Proper fermentation requires verification through multiple indicators:
-
pH measurement: Use pH strips or a digital meter to confirm acidity between 2.5-3.5, indicating complete acetic acid conversion.
-
Taste evaluation: Sample a small amount—mature vinegar delivers sharp, acidic tang without residual sweetness or alcohol burn.
-
Visual clarity: Observe the liquid’s transformation from cloudy to translucent, though some sediment remains normal.
-
Surface activity: Check for diminished or absent SCOBY formation, signaling fermentation completion.
These metrics collectively determine readiness. If pH exceeds 3.5 or sweetness persists, extend fermentation by one-week intervals, retesting until parameters align with proper vinegar specifications. Once your homemade apple cider vinegar passes these readiness tests, you can incorporate it into morning detox drinks with warm water, lemon, and honey for enhanced wellness benefits.
Straining, Bottling, and Proper Storage Guidelines
Three distinct steps transform raw fermented liquid into shelf-stable vinegar: straining, bottling, and storage protocol implementation.
First, you’ll strain the vinegar through cheesecloth or coffee filters to remove apple sediment and mother culture fragments. Double-straining guarantees clarity and removes particulates that could compromise shelf life.
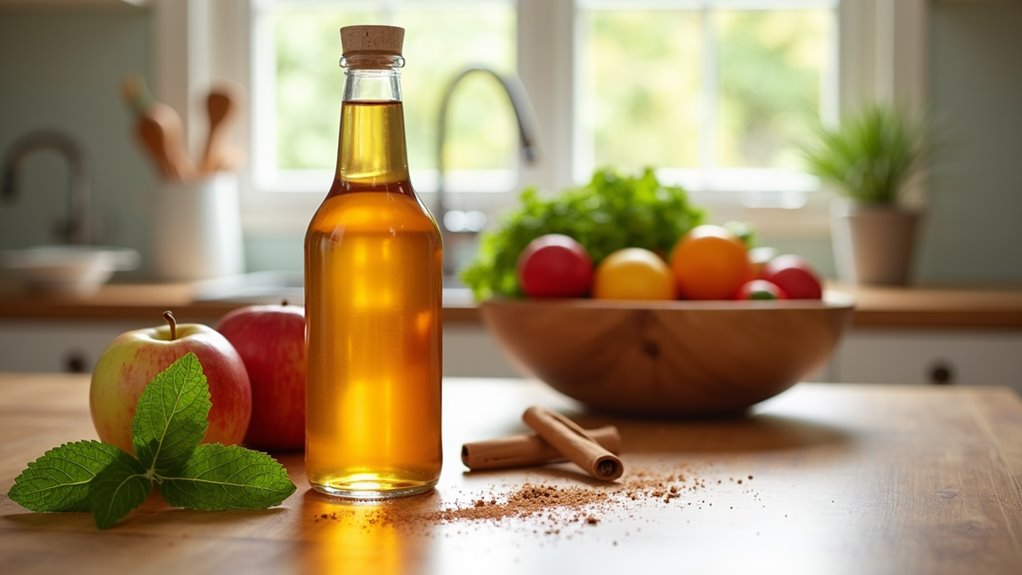
For bottling, select glass containers with non-reactive lids—stainless steel or plastic caps prevent corrosion from acetic acid. Leave minimal headspace to reduce oxygen exposure, which can trigger re-fermentation.
Store your vinegar in cool, dark locations between 50-70°F. Light and heat degrade acetic acid concentration and flavor compounds. Properly stored vinegar maintains potency for two years.
You can preserve the mother culture separately in minimal vinegar, refrigerated, for future batches. This practice accelerates subsequent fermentation cycles. The mother culture contains proteins, enzymes, and friendly bacteria that will enhance the fermentation process when you’re ready to start your next batch.